Hey Crafters! Priscilla here! Today I’ll be showing you the shaker card I made using one of the new “Shaker Card Kits” in Kat’s shop.

Here’s the products I used from Kat’s shop to make my shaker element:
(Click on each photo above to go right to the link in Kat’s shop.)
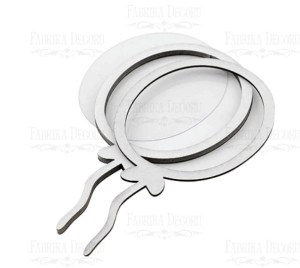
This kit includes everything (except the adhesive) to create a balloon shaker card quickly and easily! Here’s the info on these kits as described in the shop:
Included:
- Shaker Element Shape Base (3mm thick)
- Transparent film cut to fit the shape perfectly
- Decorative Frame Overlay.
You can use the decorative frame overlay the way it is which is a milky white color or you can change the color with any medium you choose such as ink, markers, watercolors, paints, etc. Anything you can use on paper/cardstock, you can use to color your frame the color(s) you’d like.
When the shaker is completed the approximate height of the shaker portion is 5mm.
You can assemble the shaker kit in several different ways. I placed a yellow background (a little less than the size of the balloon frame) on my card front and then adhered the balloon-shaped foam frame on top of it. Then I pour the “Party Confetti” sprinkles into the opening. Next I painted the top balloon frame with white acrylic paint and let that dry before adhering the acetate film to the back of it. Finally I adhered the completed frame/acetate frame over the foam frame housing the sprinkles. Done!

I finished the card with some yellow ribbon and a sentiment from my stash. Note how I scattered several different colors of Kat’s Jewels around the sentiment for a finishing touch.
Thank you so much for stopping by! Don’t forget to check out what’s NEW in Kat’s Shop and use my coupon code “Priscilla10″ for 10% off your order at the shop. Follow my blog and Instagram for more “Kat Scrappiness Amazingness”!
Priscilla🍋
The supplies I used are listed and linked below.
SUPPLIES

