







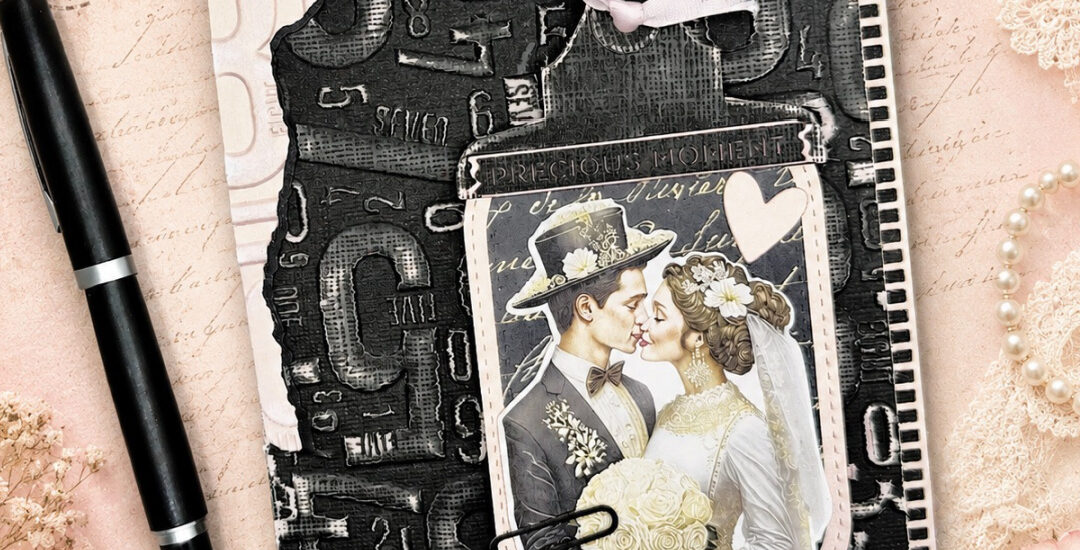
Some love stories deserve to be told in a way that feels as timeless as the memories they create. Priscilla here from Nubble Light Designs. For today’s wedding card, I wanted to capture that feeling with soft vintage details, layered textures, and a design that looks like it could have been tucked inside a treasured scrapbook for years.
The new Spellbinders “Turn the Page Collection” by Esther Glas was the perfect choice for bringing that vision to life. The notebook-inspired dies, layered pockets, tags, and delicate embellishments create a beautiful keepsake feel that’s ideal for celebrating a couple’s special day. Paired with a romantic vintage-inspired image and a soft neutral color palette, this 5″ x 7″ card becomes more than just a greeting—it’s a little memory waiting to be cherished.
So, turn the page and join me as I share the details behind this vintage-inspired wedding card.
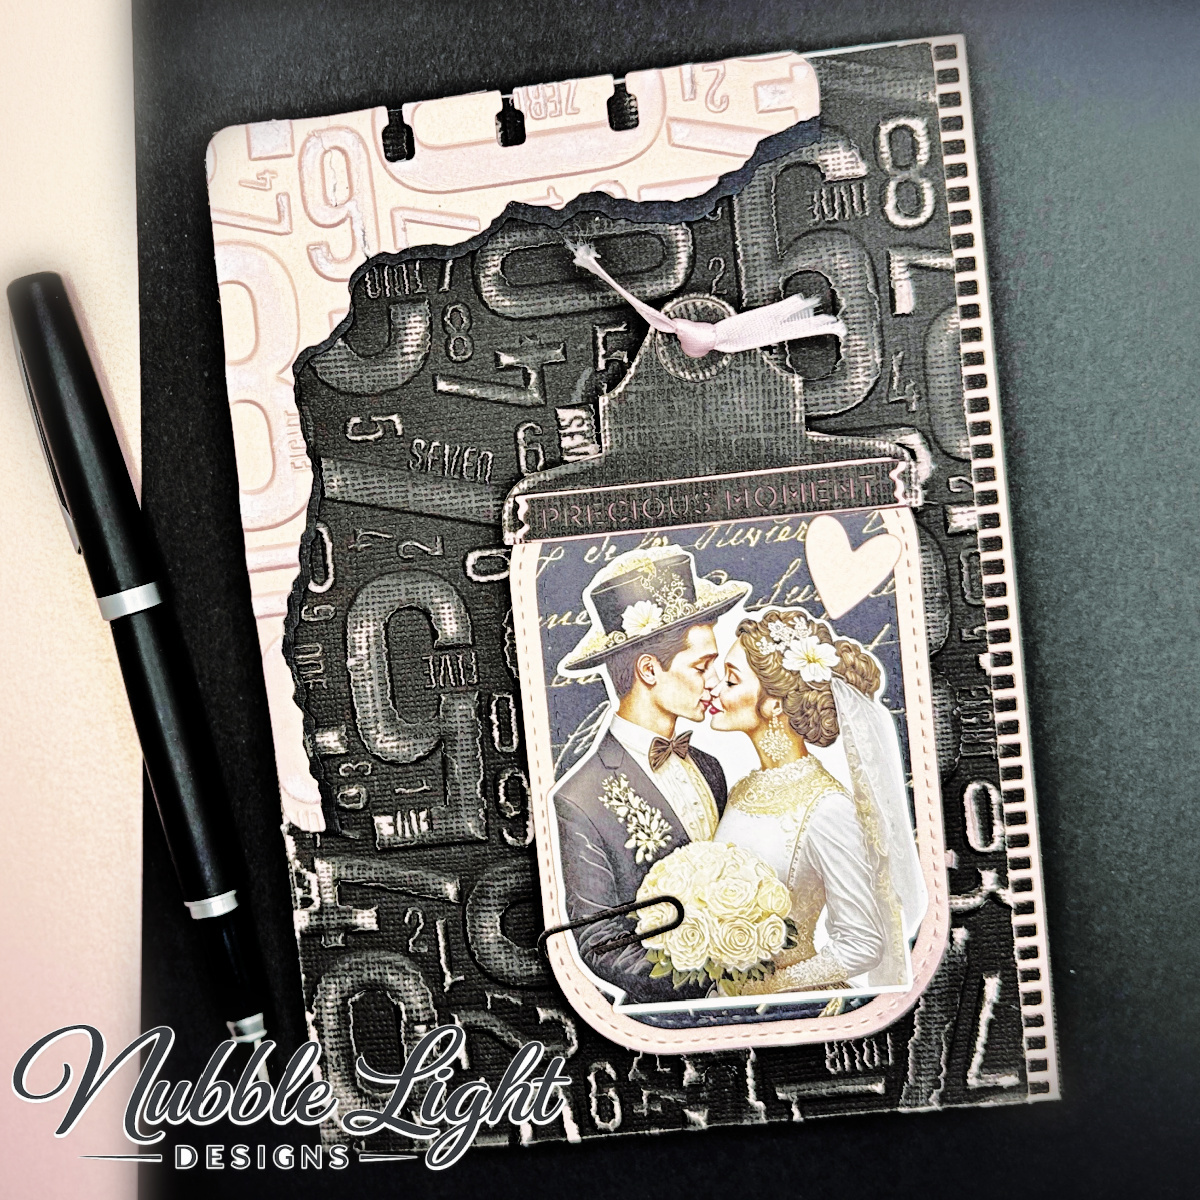
🧰 Spellbinders Products Used
- Torn Edges CardLab Etched Dies by Esther Glas
- Keepsake Capsule Borders Etched Dies by Esther Glas
- Number Field 3D Embossing Folder by Esther Glas
- Keepsake Clip (Gift with Purchase)
- Classic White ColorWheel Cardstock.
- ScrapBoys “Art Decoria” 12×12 Paper Pack
- ScrapBoys “Art Decoria” Die Cuts
📋 Card Details:
- Created an A7 card base with Spellbinders Classic White ColorWheel Cardstock.
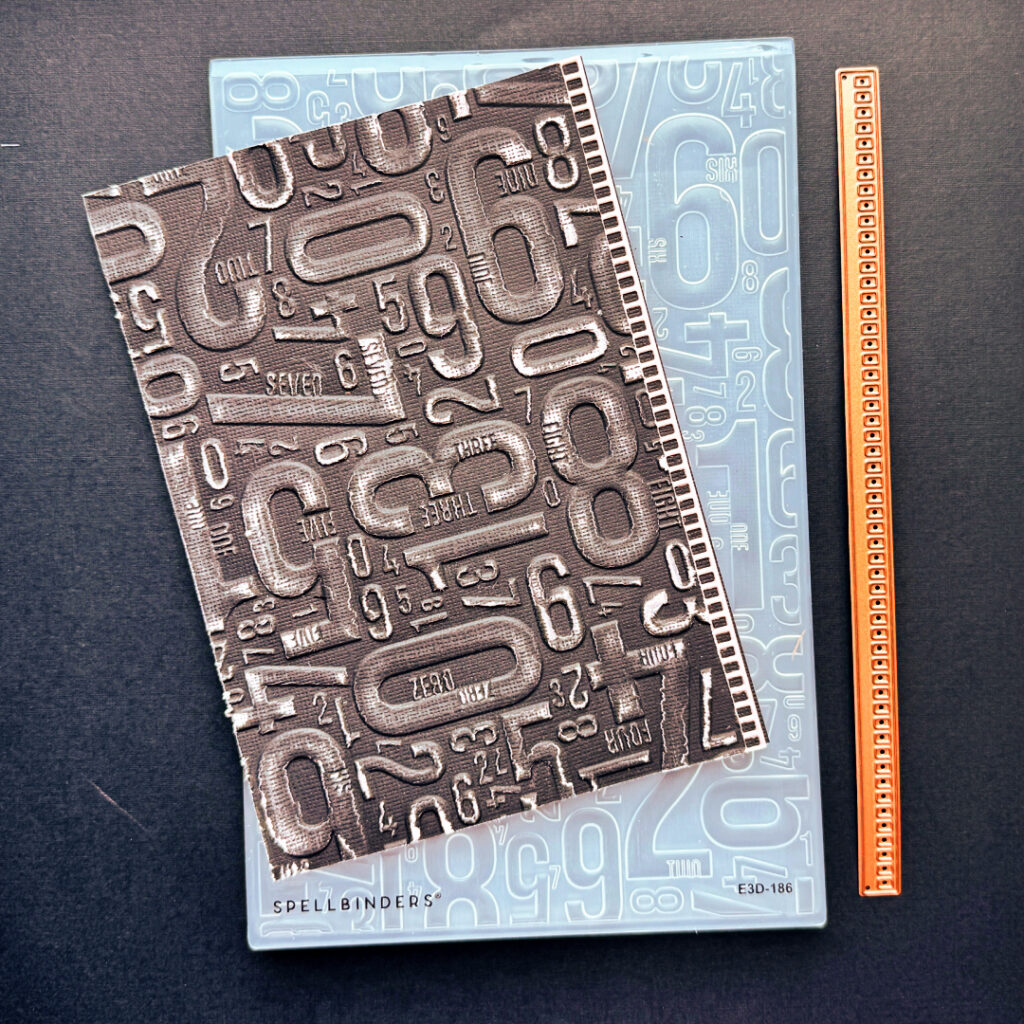
- Embossed black core cardstock using the Number Field 3D Embossing Folder and sanded it to reveal the pink core.
- Created a border using rose gold cardstock and one of the Keepsake Capsule Borders Etched Dies.
- Adhered both to the white A7 card base.
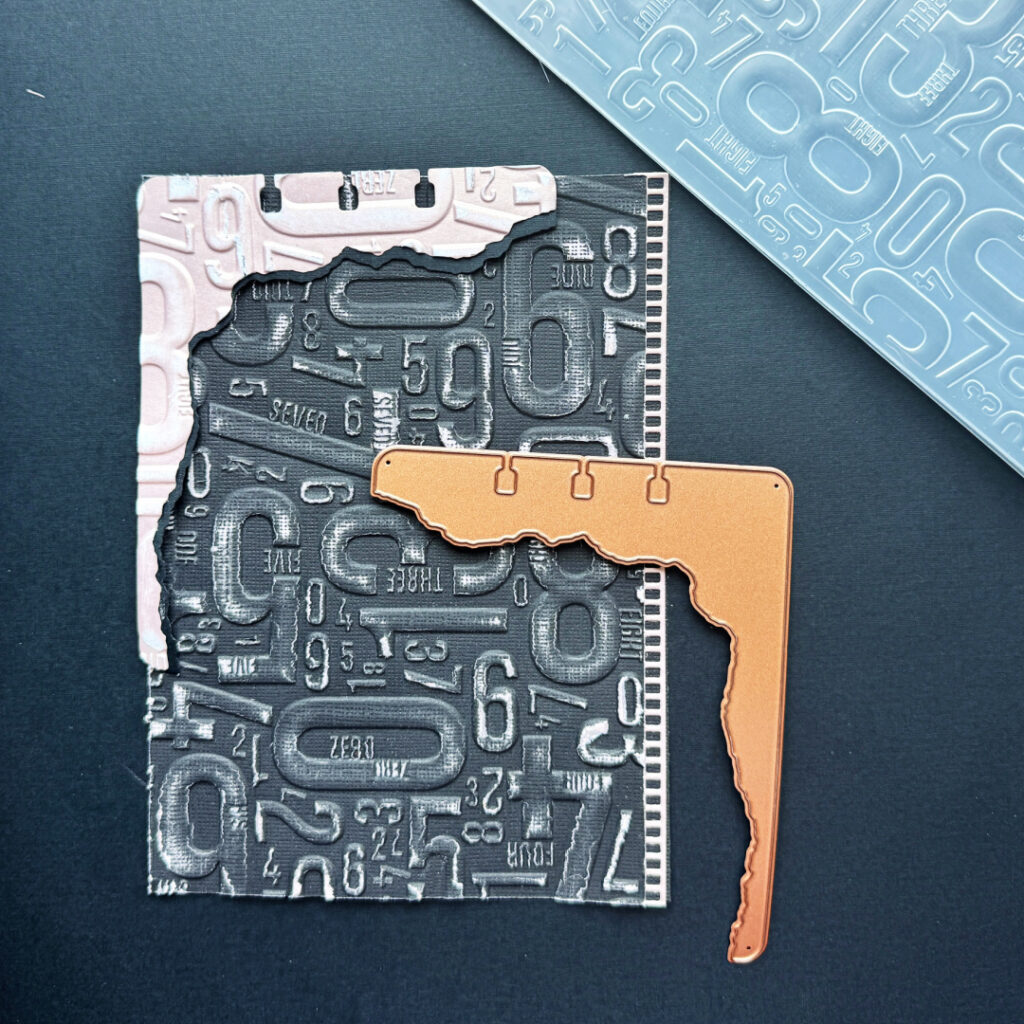
- Die cut a design element for the top left using rose gold cardstock and the corner die from the Torn Edges CardLab Etched Die collection.
- Embossed the corner using Number Field 3D Embossing Folder, distressed it with a sanding block, and adhered it to the top corner of the card.
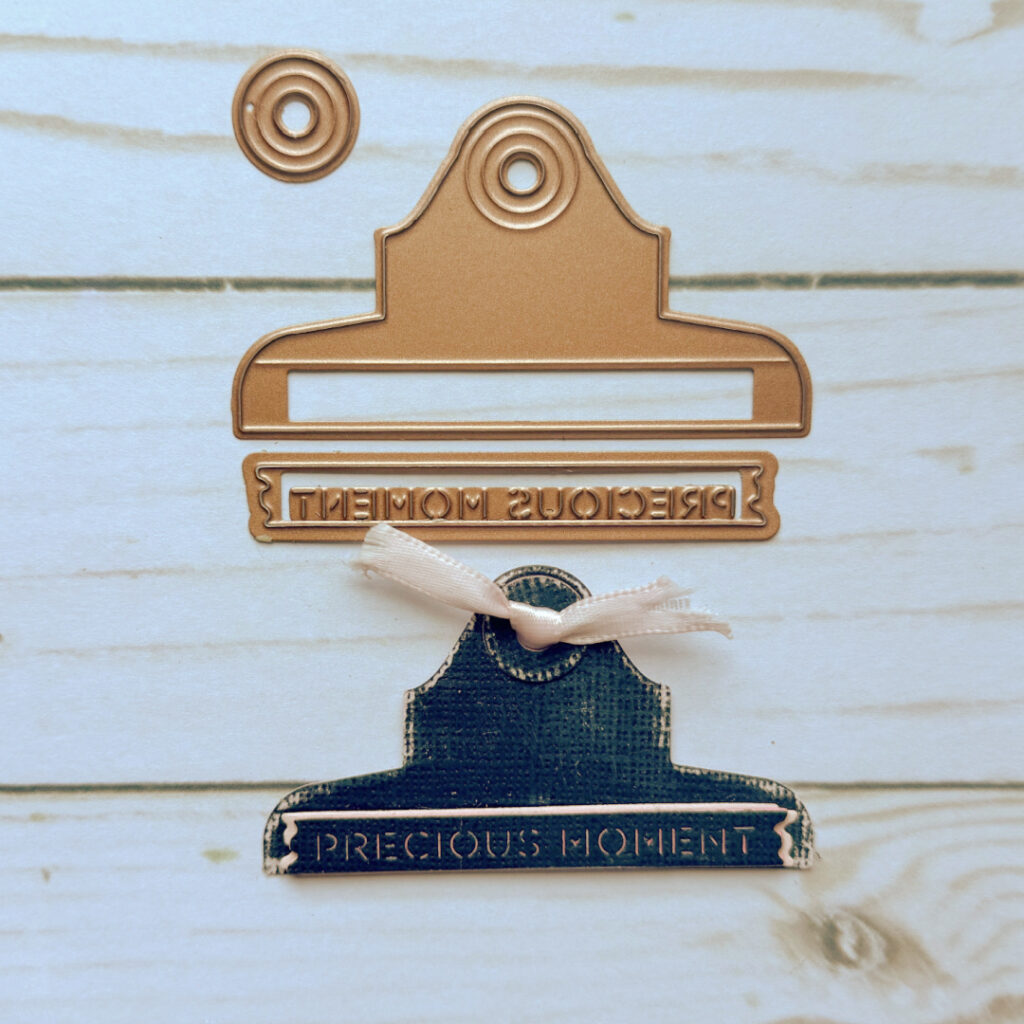
- Created the tag using the “Keepsake Clip” die and black core cardstock, distressed it with a sanding block, and added a pink ribbon,.
- Added the “Precious Moment” sentiment included with the “Keepsake Clip” die set to the bottom of the clip.
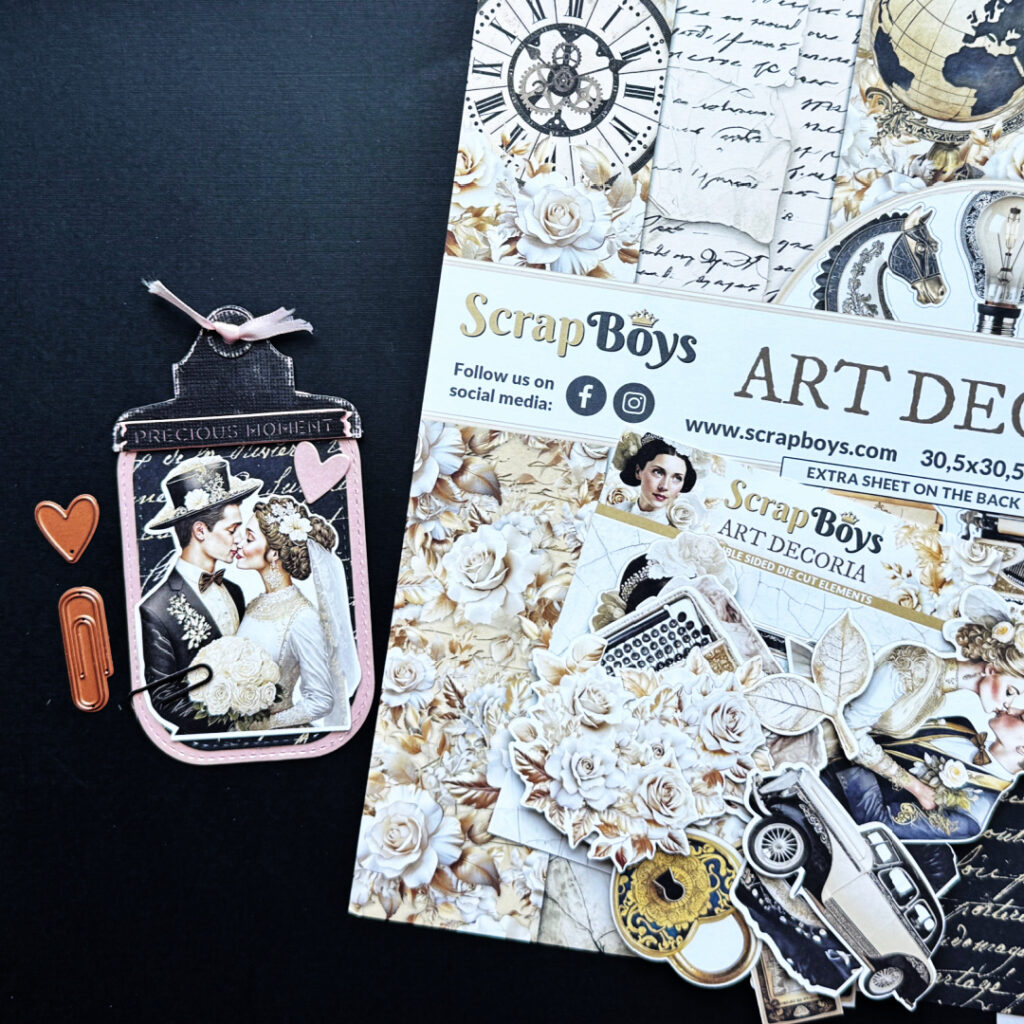
- Used a rounded corner rectangular die to create the base layer of the tag with rose gold cardstock.
- Used a slightly smaller rounded corner rectangular die and patterned paper from the ScrapBoys “Art Decoria” 12×12 paper pack to die cut the top layer.
- Added a bride and groom die cut from the ScrapBoys “Art Decoria” Die Cuts.
- Die cut a black paper clip (included with the”Keepsake Clip” die collection) and a pink heart (included with the Torn Edges CardLab Etched Dies collection) and adhered them to the tag.
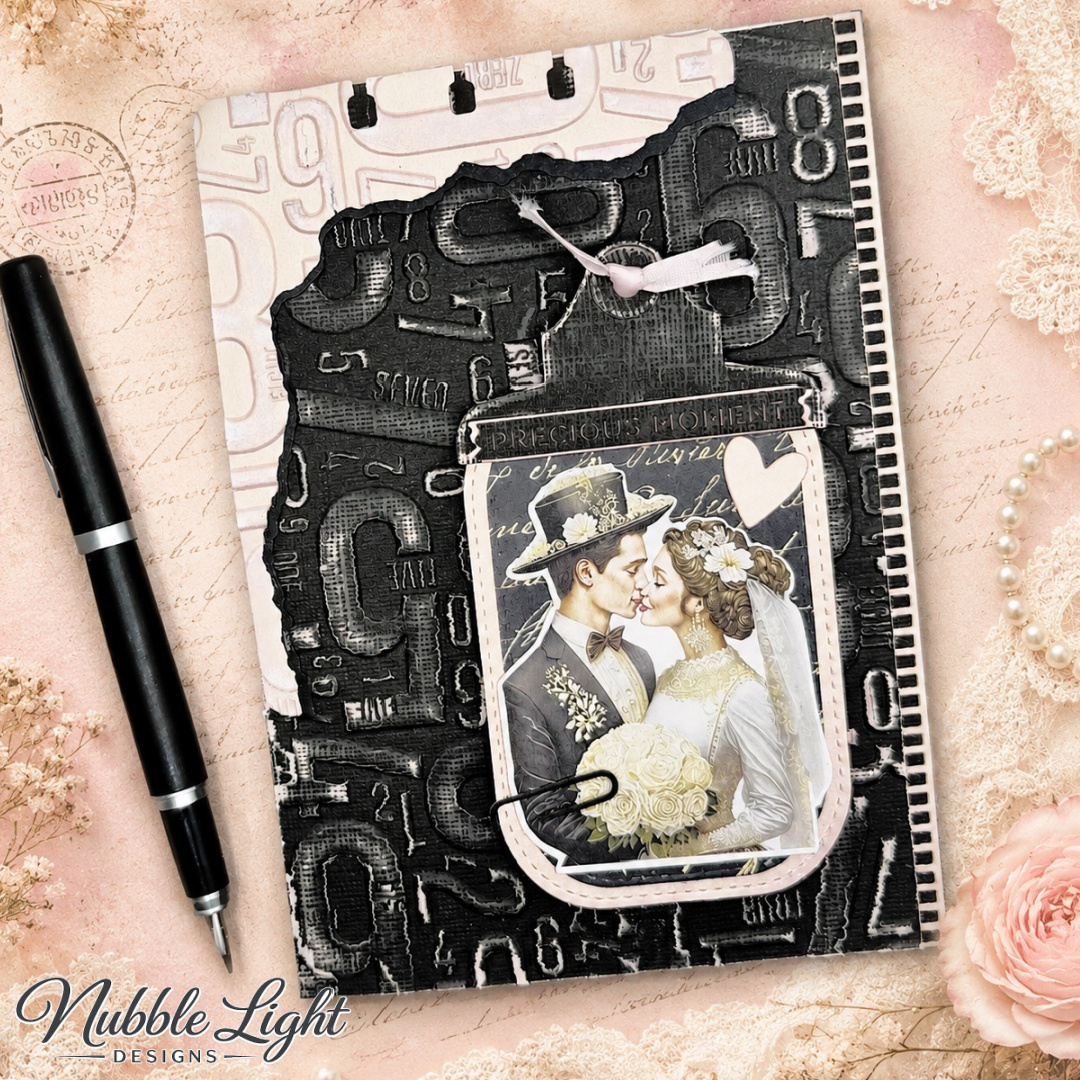
- Foam mounted the finished tag to the front of the card.
THANKS FOR STOPPING BY!
Follow my blog, Instagram, and Facebook and join me on my crafty journey as I play with stamps, ink, paint & paper… one project at a time.
I would be so grateful if you use my affiliate links in this post. No extra cost to you!